Local Security Authority Protection is Off Windows 11/10. The Local Security Authority (LSA) protection function protects all your access data. It ensures that there are no vulnerabilities in the security system through which a third-party threat can enter the system.
If this security feature is disabled for any reason, a warning message will appear on your computer indicating that the Local Security Authority protection is disabled. If this warning appears on your screen, you can prevent it by using the solutions below. Don’t waste time; start fixing the problem!
Why Was the Protection of Local Security Authorities Disabled?
Sometimes users disable this Local Authority Protection feature in Task Manager because they find it complicated. However, if this feature has not been manually disabled, this may be the reason. If you have recently noticed a yellow exclamation mark in your security settings, it could be due to the following factors.
- An outdated Windows operating system
- A corrupted Windows update cache could cause the problem.
- Windows may have accidentally reset the secure boot settings. This is an important setting that affects other processes, such as LSA after shutdown.
- LSA may be disabled if unexpected changes are made to the Group Policy Editor.
- A third-party antivirus package or firewall protection program may disable LSA on the system.
- This security setting can also disable a malware or virus attack.
How can Fix the Local Security Authority Disabling Protection?
The following solution will help you resolve the issue related to disabling Windows 11 Local Security Authorisation Protection on your system. To effectively resolve the issue, follow the same sequence.
Solution 1: Perform Some Initial Checks
Before using advanced troubleshooting techniques, follow these simple and effective basic tricks to solve the problem in just a few clicks.
- Close all open applications and programs running on your system. Then, restart the system.
- If this feature is already enabled in your security settings and you receive a warning message, try disabling it once and then enabling it again. Then, restart the system.
- Try disabling antivirus programs or third-party software to make sure they do not interfere with the feature.
If none of these solutions help, continue with the following solutions.
Solution 2: Enable LSA
You can try to activate the LSA security function in the system so that the security system thinks that this warning is a false alarm.
- To do this, open the Windows Security application from the Start menu.
- Tap the Device Security button on the left side of the screen.
- Now click the Kernel Isolation Details button.
- Then, deactivate the option in the Protect against Local Security Authorities section.
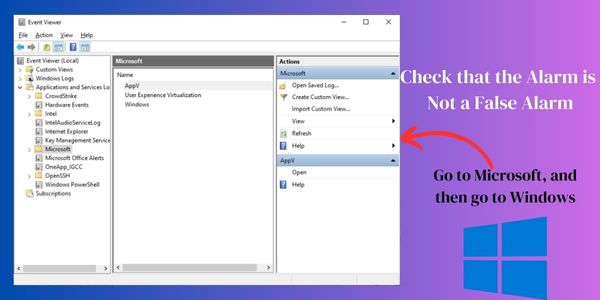
Solution 3: Check that the Alarm is Not a False Alarm
Several users reporting Windows 11 problems with “Local security authorization protection is disabled” have reported that this warning is just an error flag due to Windows update problems. Please follow the steps below to check if this is an error flag.
Note: If there is no event label associated with this event in the browser application, this feature may be disabled. In this case, you can try other solutions to fix the problem.
- Go to the Windows Search menu and look for the View Events option.
- Then, go to Program and Service Logs in the left panel.
- Then go to Microsoft, and then go to Windows.
- Then click LSA.
- Now, find the event ID 5004 associated with LSA and make sure that it is enabled and active.
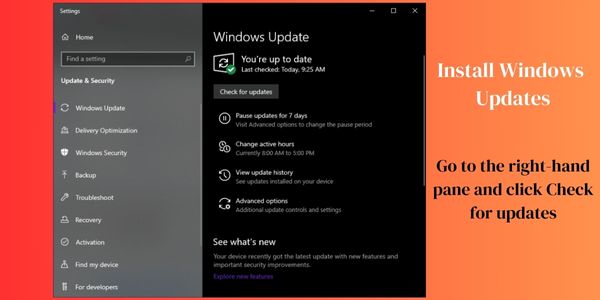
Solution 4: Install Windows Updates
According to multiple reports, a bug in the Windows update released in March 2023 disabled Local Security Authority protection. You can solve the problem by updating your operating system to the latest version.
Follow the steps below to update your Windows operating system.
- Press the Windows + I keys simultaneously to go to Windows Settings.
- Then click on Windows Update in the left part of the window.
- Go to the right-hand pane and click Check for updates.
- If you find an available update, click Install Now to update to the new version.
- If your Windows 11 operating system has already been updated, run the latest version.
- Once you update your device, restart your system and see if the problem with disabling Windows 11 Local Security Privilege Protection on your system is resolved.
Solution 5: Remove Recently installed Third-Party Applications
If you notice that this warning appears after installing a third-party program, especially from a questionable source, it means that the program may be malicious. The malicious program could have infiltrated your system to steal your login credentials by disabling the LSA feature.
To remove the program you just installed, follow the steps below.
- Open Windows Settings by pressing the Windows key + I at the same time.
- Then click on Program settings.
- Find the recently installed or conflicting programs and select them.
- Then click Uninstall. Follow the instructions below to complete the uninstallation process.
- Click Start and type %appdata%. Then click Open.
- Locate the folder with the installed programs, right-click it, and use the Uninstall option to remove it.
- Then press the Windows key and type %localappdata%. Click Open to open it.
- Find the Applications folder and delete it from the system. Then restart your computer.
Solution 6: Resetting and Restoring Windows Security Settings
Sometimes a corrupted or malfunctioning Windows security application can disable local protection on a device. If you accidentally changed the settings of this app, correct and restore the settings on your device.
Use the following instructions to repair and restore the Windows Security app.
- Press the Windows + I key combination to open Windows Settings.
- Then select Applications from the left menu, and select Applications and Properties or Installed Apps from the right menu.
- Please scroll down to find the Windows Security app and tap the icon with three dots next to it.
- At this point, tap Advanced Settings.
- Then tap the Edit button to edit the app. Follow the instructions to see if the warning is removed.
- If the problem persists, tap Reset and follow the on-screen instructions to restore the app.
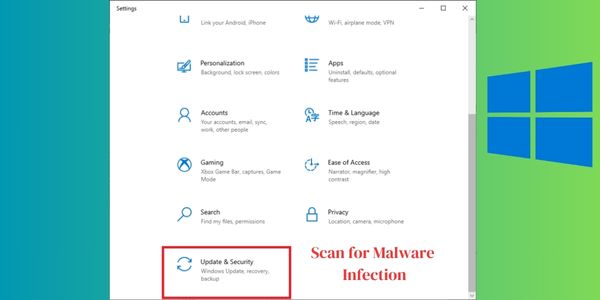
Solution 7: Scan for Malware Infection
Any malware or threat that detects a vulnerability on your device can disable the LSA feature to access credentials. Therefore, a Windows Defender malware scan can be run on your device to remove threats. Once the threats have been removed, follow the recommended steps to remove them.
- Press Windows + I to open Windows.
- Then click Update and Security.
- Then click Windows Security and select Virus and Threat Protection.
- Then click on the Scan settings link.
- Then select any option (preferably the Full scan option) and then click Scan now.
- The screen will display all the threats present on the system, and click Start action.
Finally, the default virus detection program will detect and remove all malicious files, directories, viruses and malware on your computer.
Related Topics
USB Device Not Recognized On Windows? 8 Solutions How To Fix
Conclusion
Although the display of a warning about disabling local security center protection can be annoying, there are several steps you can take to correct the error, which we will describe here.
All of these solutions can be easily implemented without specialized knowledge. Thus, the problem of turning off the protection of the Windows 11 Local Security Center can be solved in just a few steps. In this article, I have tried to list possible solutions that work for many computer users, and I hope some of them will help you as well.


