Android devices with different sizes often display incorrect storage capacity when flashed with newer firmware. This issue is more common among all devices. Especially those flashed through unlocked bootloaders. Firmware packages for these devices include user data. An image image file, which can cause the device to only show 8GB of available storage.
Flashing a new custom ROM can provide great new features and performance improvements to your Android device. However, a common issue of many users face after flashing a new ROM is that Incorrect Storage Capacity displayed. The total storage space seems less than it is.
Solutions for Incorrect Storage Capacity in Android
This incorrect storage capacity display can be quite annoying. Fortunately, many solutions can be tried to fix this issue.
Wipe Cache and Dalvik Cache
After flashing a ROM, wiping the cache and Dalvik cache is always recommended. This clears out any residual files from the old ROM that may be causing conflicts.
To wipe the caches:
- Turn off the phone and start in safe mode or recovery mode.
- Tap wipe cache partition and clear the Dalvik cache.
- Reboot your device.
Wiping these caches will clear out any corrupted files and give a fresh start to the new ROM. In many cases, this simple step itself is enough to correctly display the storage capacity.
Format Data through Recovery
If wiping caches did not work, then formatting the data partition from recovery can help. This will completely clear out all old data and reformat the data partition.
To format data:
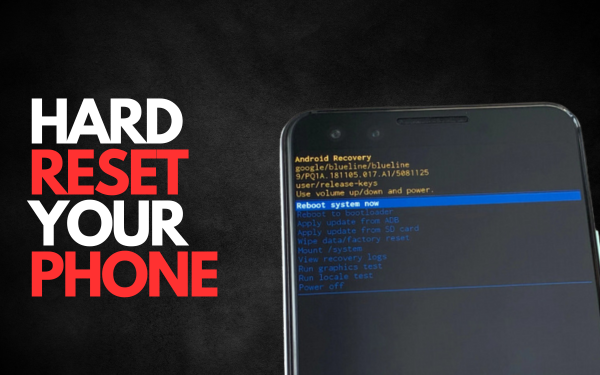
- Boot into recovery mode.
- Select ‘Wipe Data/Factory Reset.’
- Select ‘Yes’ on the confirmation prompt to format data.
- Reboot the device – the ROM will be freshly set up again.
Formatting data gives a clean slate for the new ROM and has a good chance of fixing the incorrect storage issue.
Wipe System Partition ( Incorrect Storage Capacity )
The system partition contains all the ROM files and can get corrupted sometimes while flashing custom ROMs. Wiping and reformatting the system partition will set it back to a clean state.
To wipe the system:
- Get into recovery mode.
- Select ‘Wipe System’.
- Confirm on prompt.
- After wiping the system, flash the ROM zip file again.
- Reboot device.
This will install a fresh copy of the ROM and has a good probability of displaying the correct storage capacity now.
Factory Reset from Settings
If the above recovery-based options do not work, you can also try doing a factory reset directly from the ROM’s settings.
To reset from settings:
- Go to ‘Settings’ and select ‘Backup & Reset‘ (or ‘System’ in some ROMs).
- Choose ‘Factory Data Reset’.
- Confirm on prompt.
- The device will reboot and reset the ROM to the factory state.
Doing this full factory reset from within the ROM can flush out any inconsistencies and may end up displaying the proper storage capacity.
Re-flash GApps ( Incorrect Storage Capacity )
If your new ROM is having issues with apps like Play Store and Google services, it is recommended to re-flash the GApps package:
- Boot into recovery mode.
- Flash the latest GApps zip package.
- Wipe cache and Dalvik cache after flashing GApps.
- Reboot device.
Re-flashing GApps will refresh all Google apps & services and can also fix any anomaly with storage capacity displayed in the settings.
Check with a File Manager
To double confirm that it is just an incorrect display issue and not an actual storage limitation, you can check the free space with a file manager app.
Install any file manager app from the Play Store. Navigate to storage and check the free space available. Compare this with what is shown in Settings.
If there is a major difference, then it confirms the issue is just with the storage capacity display, and your actual storage space is intact.
Update or Re-install the ROM ( Incorrect Storage Capacity )
- If all the above options fail to fix the incorrect capacity issue, the last resort is to update the ROM or re-install it cleanly.
- Get the latest ROM version – it may have bug fixes for capacity issues. Before installing, wipe data, cache and Dalvik cache.
- If the latest version still faces problems, backup data & re-install the ROM from scratch. Set up the device like new after re-installing.
- This should definitely correct any storage capacity discrepancies.
Summary
| Solution | Steps |
|---|---|
| Wipe Cache and Dalvik Cache |
|
| Format Data through Recovery |
|
| Wipe System Partition |
|
| Factory Reset from Settings |
|
| Re-flash GApps |
|
| Check with File Manager |
|
| Update or Re-install ROM |
|
Related Topics
- Bluetooth Not Working On Android Phone? Here’s How To Fix It
- How To Fix Headphones Not Detected By Android Phone
- No Sound On Android Videos? How To Fix Speakers Not Working!!!
People Also Ask About incorrect Storage Capacity After Flashing New ROM in Android
This is a common bug caused by leftover files from old ROM causing conflicts.
Will wiping the cache and Dalvik cache fix the storage capacity issue?
Wiping caches has a good chance to fix it as it clears out corrupted files.
If the factory reset from recovery doesn’t work, what should I do?
Try re-flashing the ROM cleanly after wiping data, cache, and Dalvik cache.
How do I fix full storage on my Android?
To optimize Android storage, delete unused apps, transfer photos and videos to cloud storage, clear app caches and data, use a storage management app, and consider adding an SD card.
Conclusion
Display issues with storage capacity after flashing ROMs can be annoying but are usually easy to fix. Follow the solutions step-by-step to isolate the cause and correctly show the actual free space available. With some patience, you’ll be able to use the full storage capacity as it should be. Enjoy the new ROM!


![Can't Find EMP.dll? 6 Quick Fixes for the Error in Hogwarts Legacy [2024] How To Fix in 6 Steps EMP.dll Not Found Error?](https://denetsoft.com/wp-content/uploads/2023/12/DM-Serif-Display-14-1.jpg)

